Computer Controlled Cutting
Laser Cutting
Laser cutter can cut away material and do engraving on it. There is vector cutting and engraving (etching), as well as raster engraving, each producing different results. Raster engraving takes a longer time than vector scoring/etching. In general, we use laser cutting on cardboard, paper, plywood and acrylic. The laser will burn away material. Applications for laser cutting are varied, and different applications are more suited for different types of rendering. Cutting, marking or engraving is made with raster and vector programmes, screen printing can be done with halftone, holes and path.
There are many softwares that can be used for laser cutting, such as Corel Draw, Gimp, Photoshop and Illustrator. As I will be using Illustrator, an important thing to take note is the stroke width for a hairline stroke, which is 0.001, used for vector cutting. There are also reccomended settings for laser cutting with different machines and materials. We use RED (R255, G0, B0) and set the line weight to hairline for vector cutting & Green (R0, G255, B0) for engraving.
In SP, the CO2 laser is used. However, there are many types of laser used in the industry, which have different properties and affect how deep they can cut, how they cut. A fiber laser for example, will able to cut deeper than a CO2 laser.
Airflow/air assist is very important for safe laser cutting as it prevents fires from starting. We must remember to turn on the air assist and exhaust pump when using the laser cutter.
Safety
- We must always take note of laser safety. Some laser cutters require a license to operate, depending on what class it is. The ones at SP are safe as the laser will be cut off when the lock is opened.
- Cutting certain materials will release poisonous fumes. As a result, we do not cut materials such as PVC, since they release chlorine gas. Make sure that you only cut prohibited materials, always ask if you are unsure.
- It must be operated under supervision at all times. There is a fire hazard as a laser is involved. If you see any fires started along the cuts, stop the operation immediately.
- If there is a fire that does not go out, press the emergency button and lift the cover to stop the laser. Lifting the cover will always instantly stop the laser.
- Make sure to turn on both the compressed air and exhaust to ensure that dust and fumes are being removed from the cutting area.
Laser Cutter Practical Session
For our first practical session, we learnt how to use a laser cutter in person. Before we start, we must pass the test to operate the machine. In FABLAB, there are three laser cutters. The one we used today was the Epilog Laser Fusion M2.
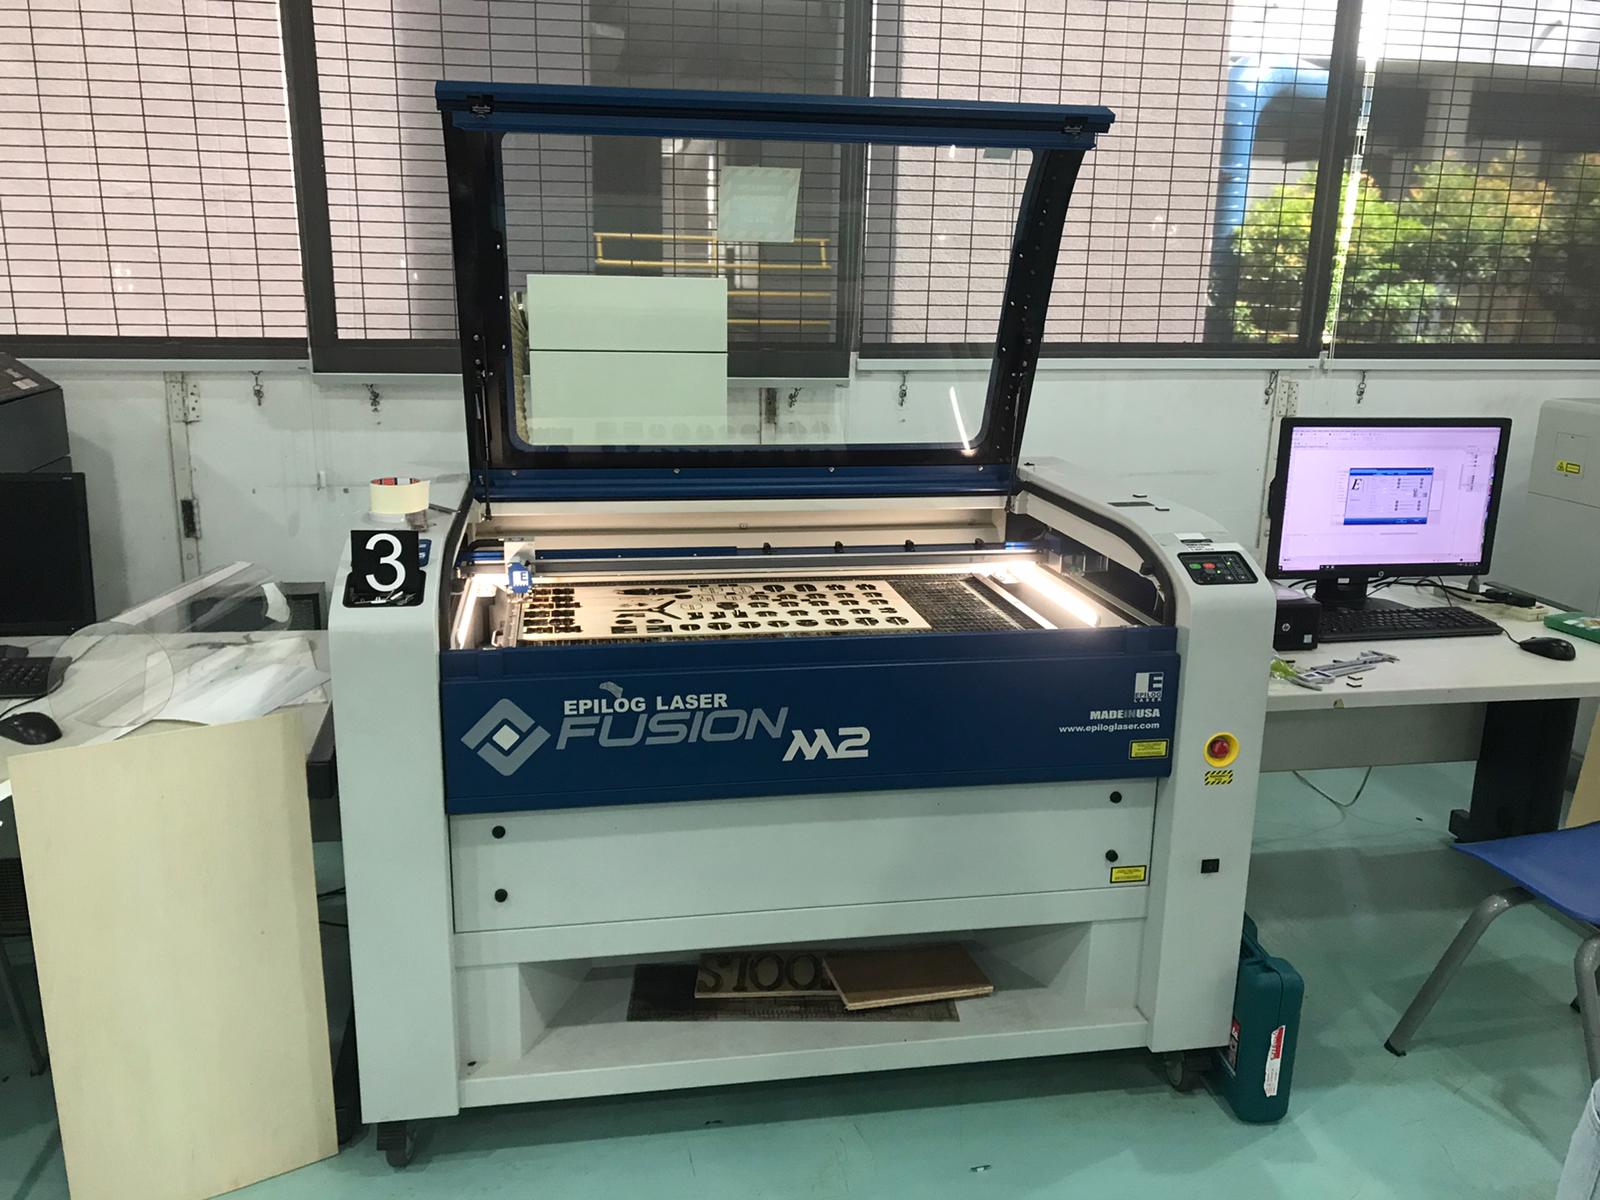
- Make sure the main switch is on. Check that the green light behind the machine is on
- Turn on the machine (black button infront) if it isn’t on yet.
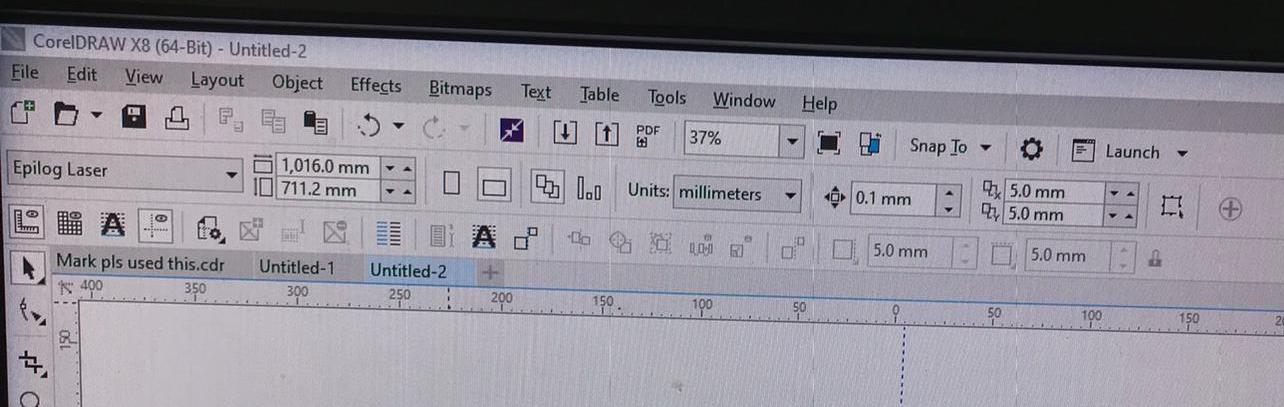
- On the computer (CorelDraw is able to open all file types including PDF, SVG, EPS, etc), make a new file which is the size of the wood, and move the crosshairs to the top left edge to set the origin.
- Make guidelines of about 5mm by dragging from the sides and keying in “-5” and entering.
- Have your design ready before coming to FABLAB, and prearranged so you do not waste time there. Import it using Ctrl+i.
- Group your design before moving it (ctrl+g).
- Move it to the origin (blue lines will appear to show it is aligned).
- Once everything is organised properly, click the print button at the top left.
- Under properties, change the settings according to your project. The thickness of the plywood we were using was 4mm. Change it according to the thickness of your material.
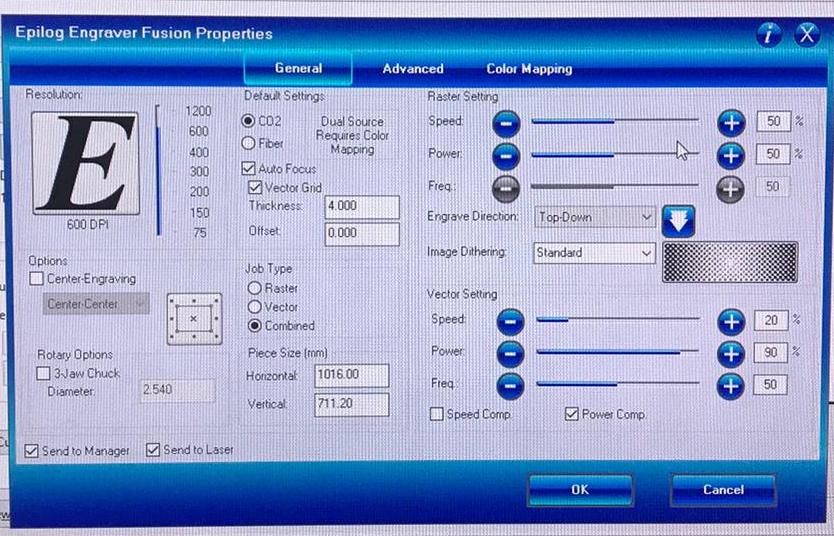
- Change the job type to vector if you are doing cutting only, and use combined for a project with engraving and cutting.
- For cutting, under Vector settings, change the power and speed. Lower speed will cut through thicker material as the laser will move more slowly. For power, do not go more than 90.
- Your first attempt might not cut through and you will have to adjust the settings. Only change one parameter at a time.
- Once you are satisfied, click “OK” and “Apply”.
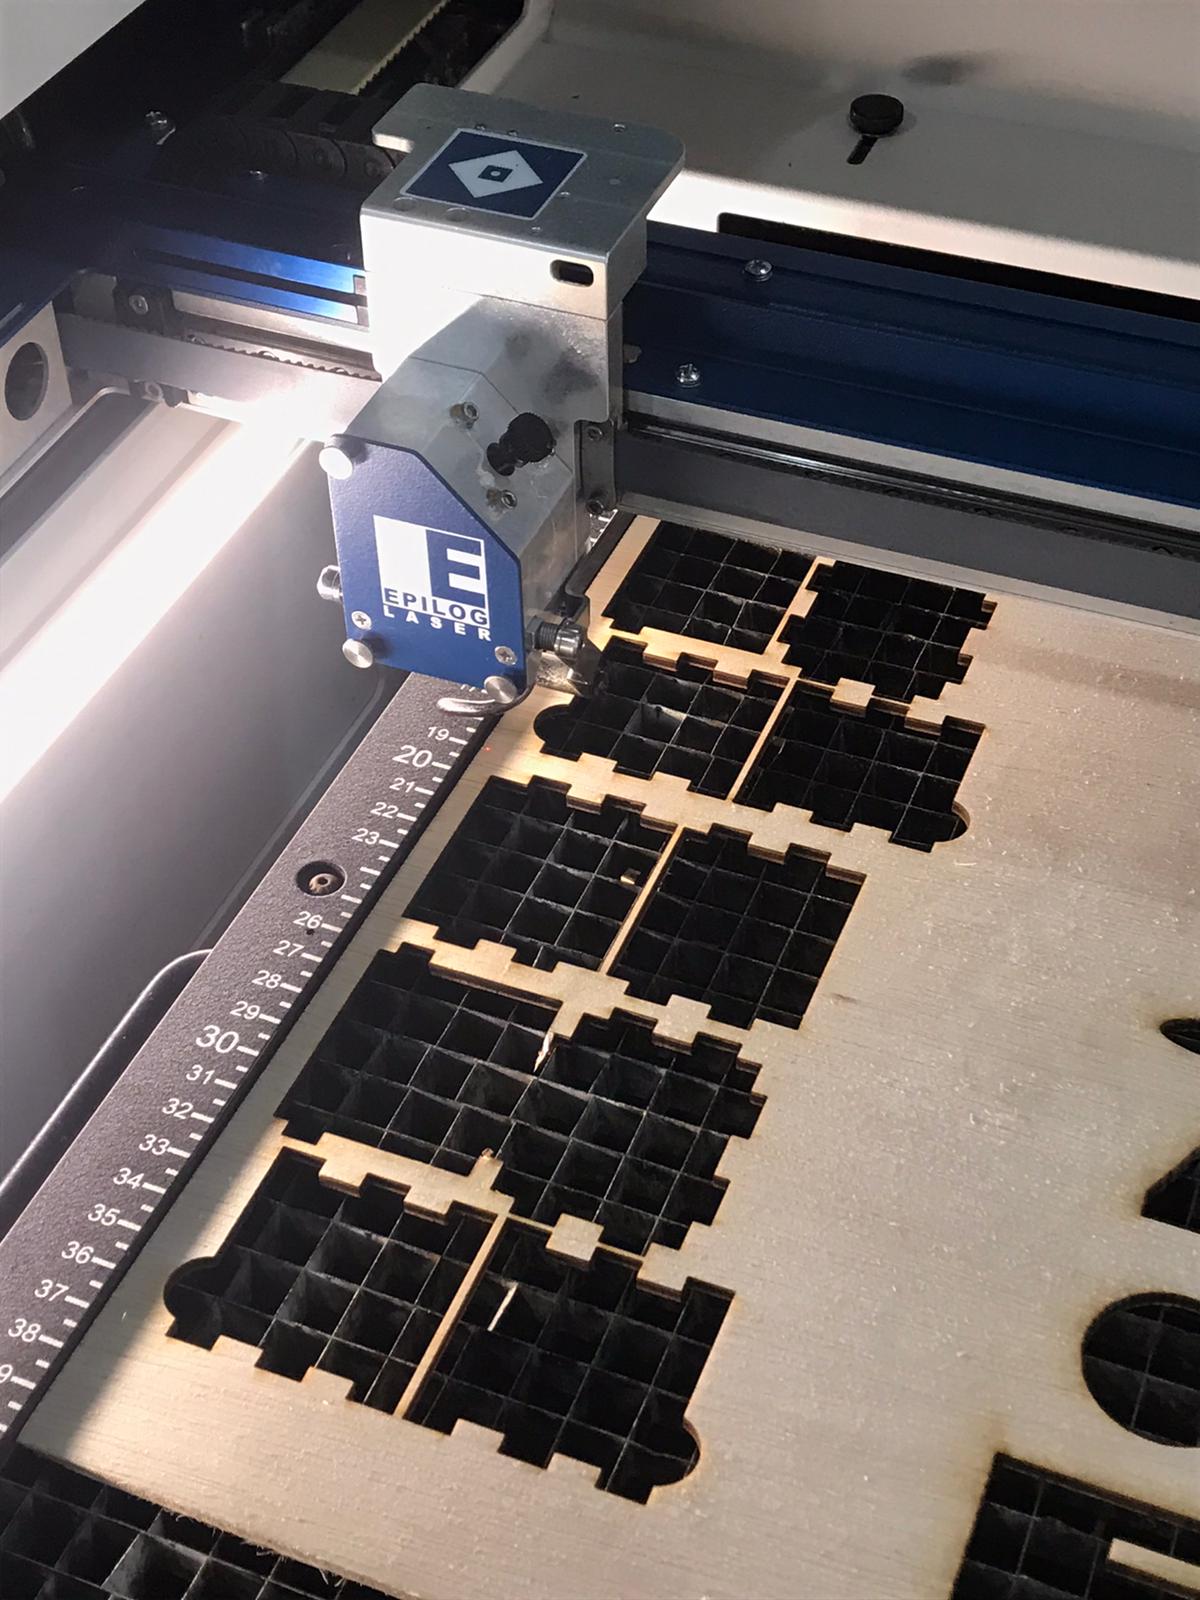
- On the laser cutter, use the red button to turn on the LED light which marks where the laser is.
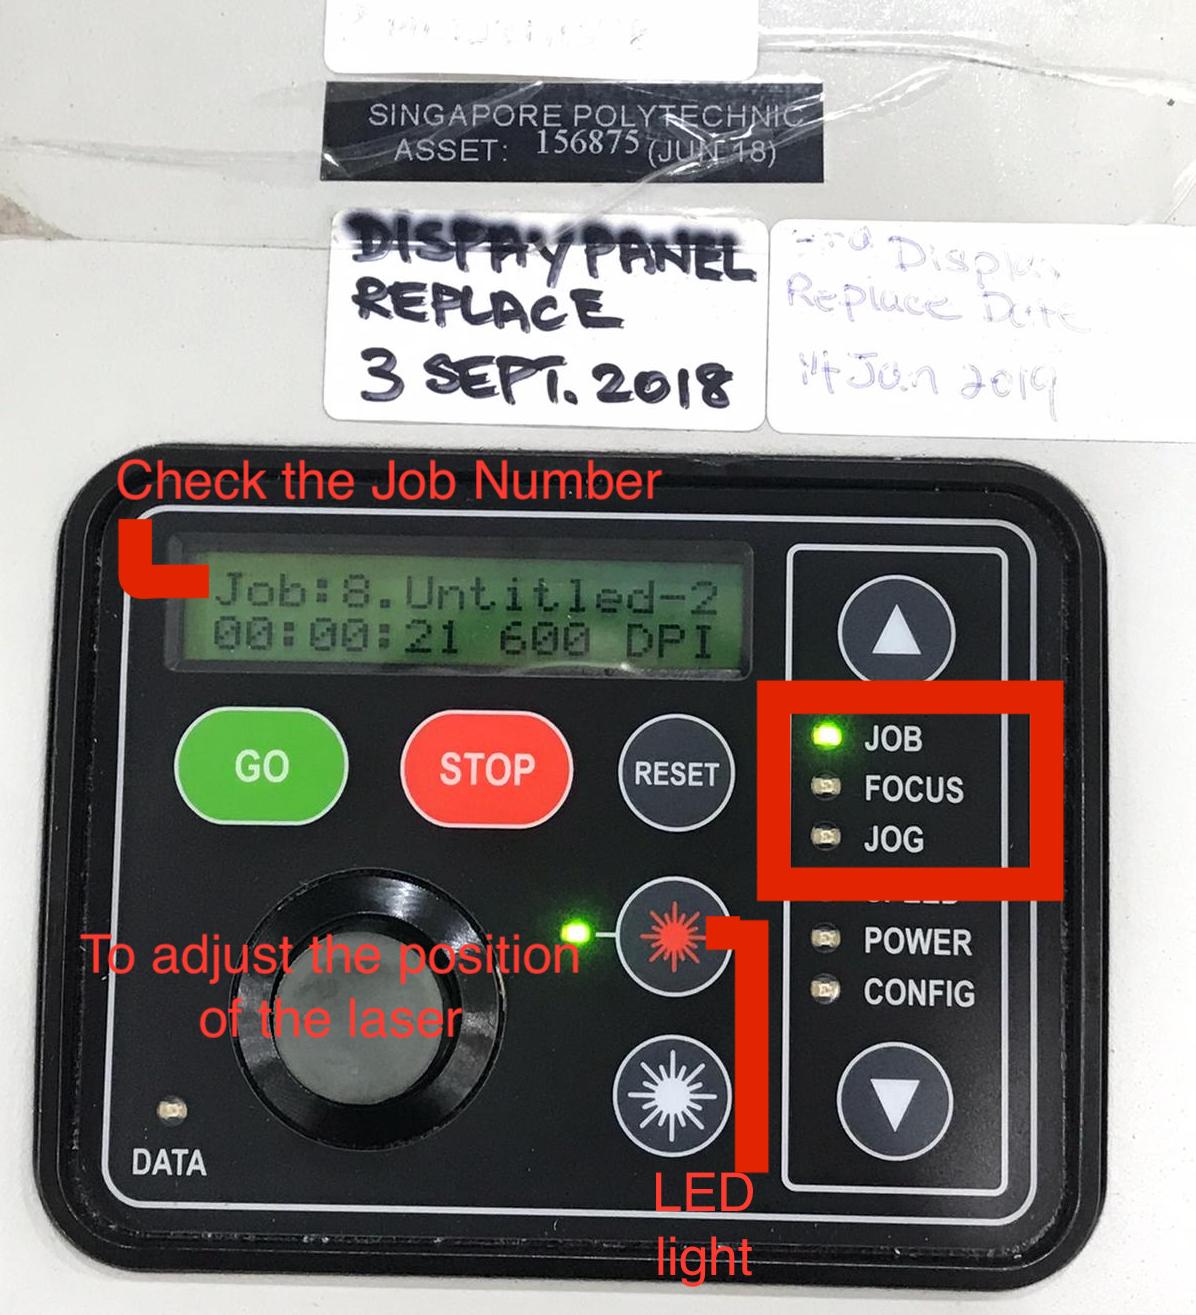
- Ensure that the job number is correct. Use the down arrow to toggle the green light to “jog”.
- Use the lever to move the laser to an empty space, keeping in mind the 5mm allowance given.
- Press the lever button down to set it in place and click PRINT to test (cover is open). Check that it does not overlap and ensure that it is in the best position.
- When it is in the right place, close the cover and click print.
- When using the laser cutter, you must stand on the yellow circle on the ground and cannot leave the station while the operation is in progress or it will be cancelled.
- If you see any fires, it is normal but if the material catches on fire, open the cover (do not press the emergency button).
- Open the cover about 5 minutes after it is done laser cutting so that the burning wood smell will not go into the lab.
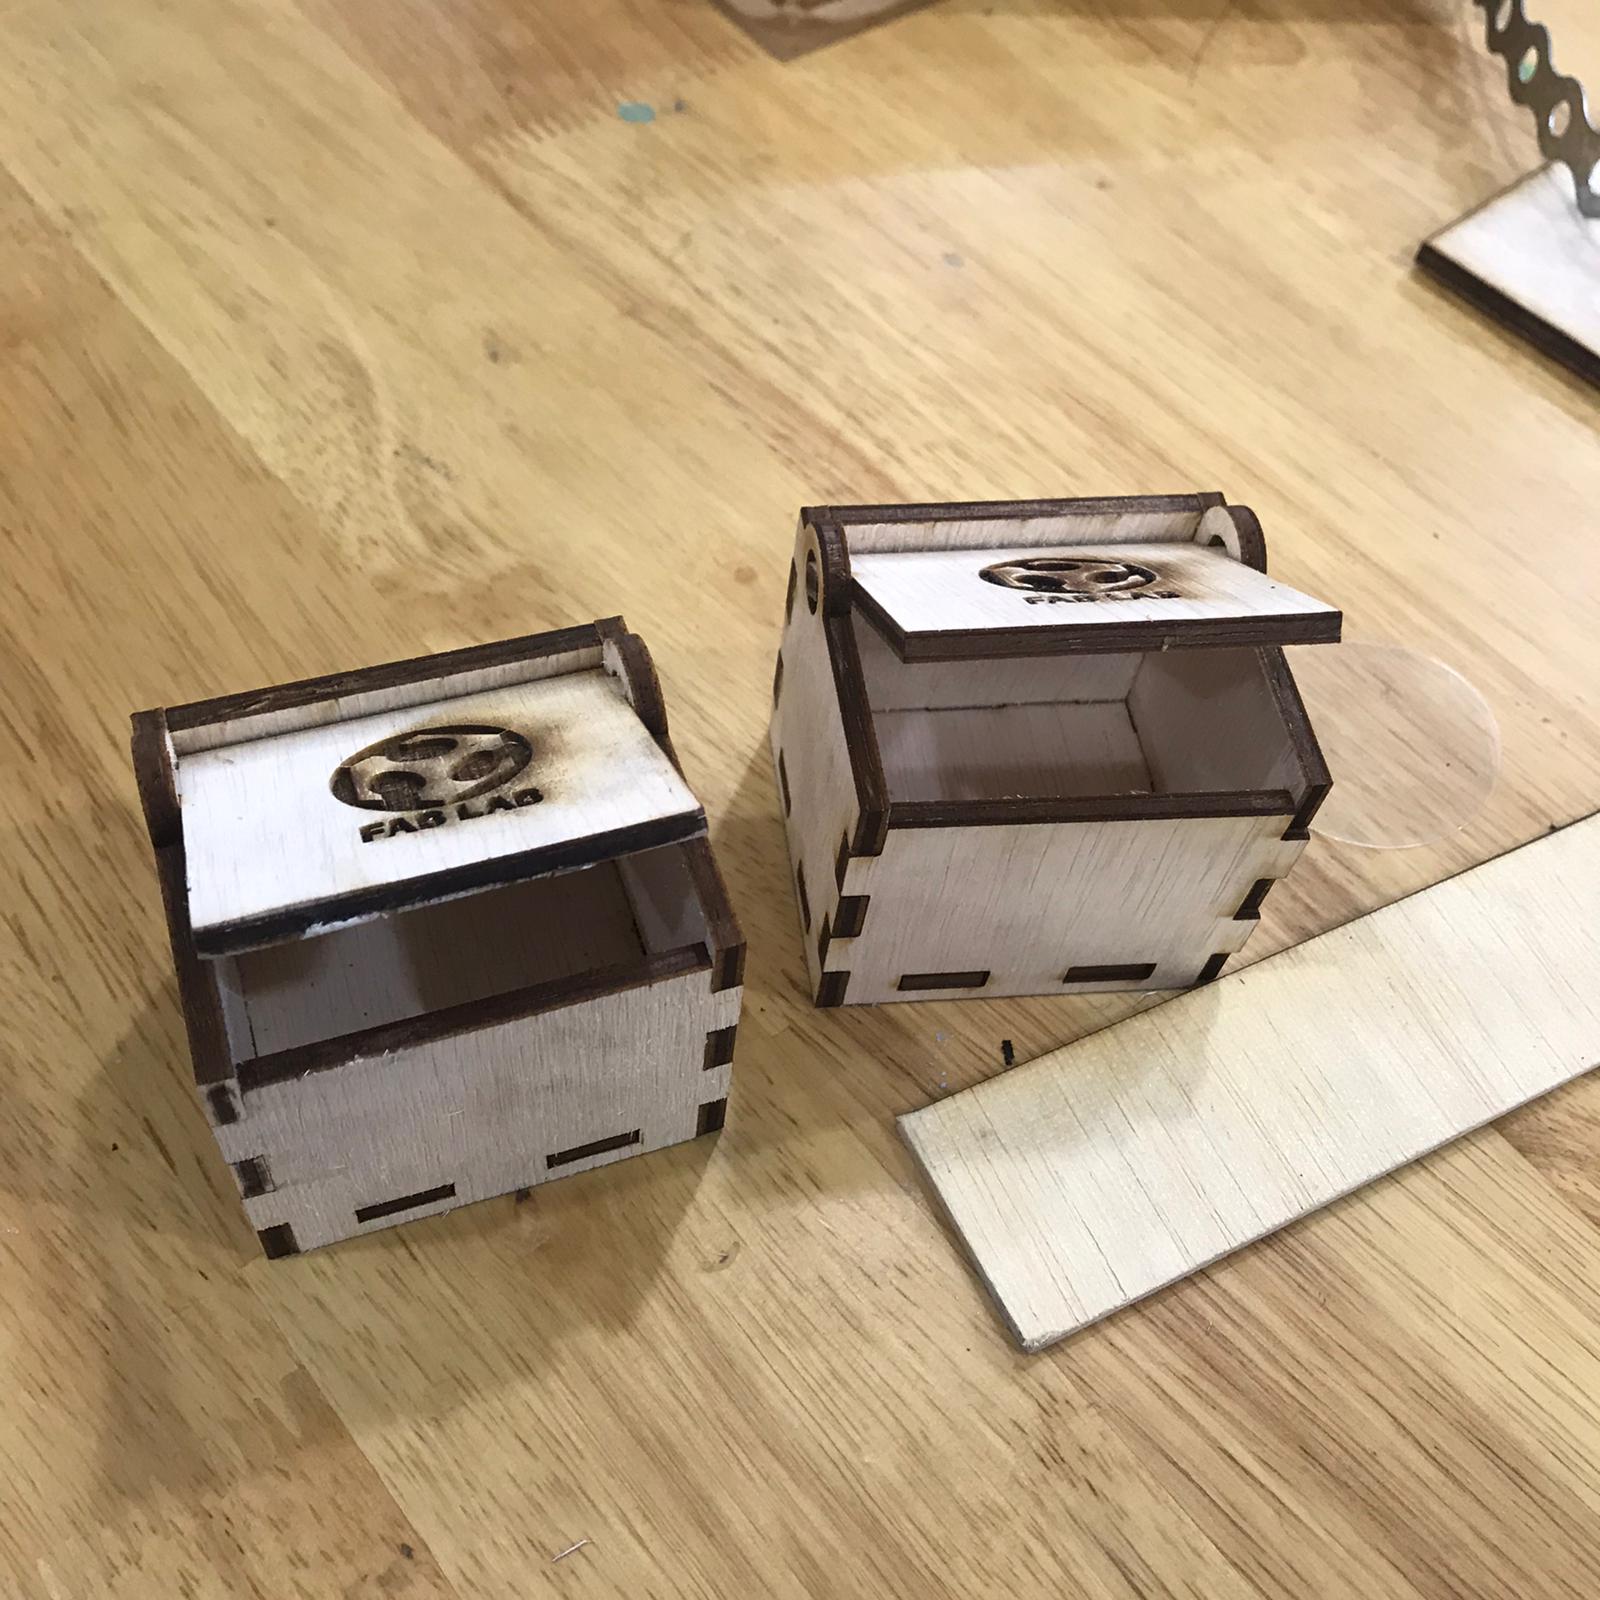
- Use a ruler or piece of tape to remove the pieces.
- Check the kerf by measuring the piece with vernier calipers and the hole in the wood it was cut from and subtract (?)